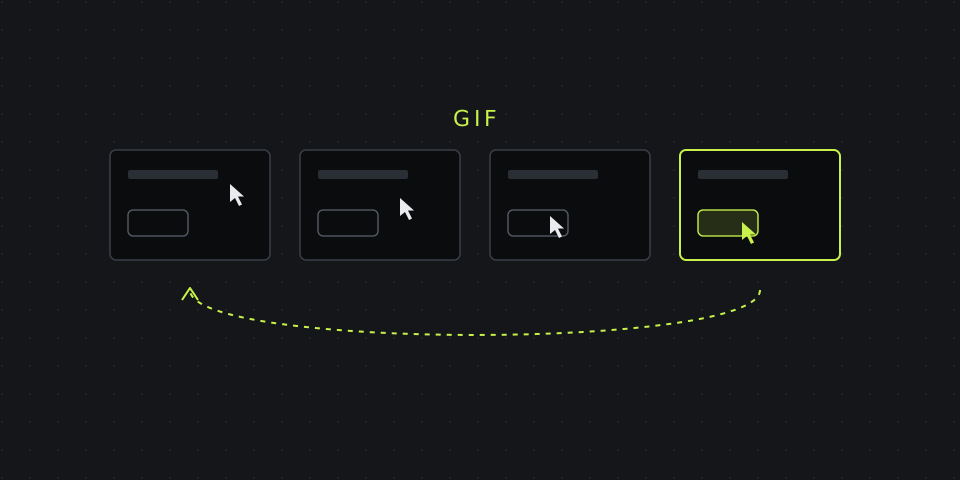
Why a GIF instead of a video
A video needs a click, a player and the viewer's decision to spend a minute on it. A GIF is just there: it starts playing the moment the message or ticket opens and repeats on its own. For short visual explanations, that difference matters more than quality.
GIFs are the right format when:
- The thing you're showing takes a few seconds — a hover state, a broken animation, a drag-and-drop, the three clicks to reach a setting.
- It goes into a place where videos are awkward — a GitHub pull request, a Jira or Linear ticket, a README, a design review, a help-center article.
- Sound doesn't matter. GIFs have no audio. If you need to explain while you show, record a video instead.
And they're the wrong format for anything longer than 10–15 seconds: file size grows fast, colors get banded, and nobody watches a two-minute GIF.
Method 1: Record your screen straight to GIF in Chrome
The fastest route skips the video entirely. With the DashShot Chrome extension — an extension, not a desktop app — the steps are:
- Press Ctrl+Shift+R (Cmd+Shift+R on Mac), or open the extension and choose recording.
- Turn on the GIF option (up to 12 seconds, no sound). Optionally turn on the crop option to drag out just the part of the screen that matters, and the camera bubble if you want your face in it.
- Pick what to share in Chrome's dialog — a tab, a window or the whole screen — and wait for the 3-second countdown.
- Do the thing you're showing. A progress bar fills up towards the 12-second limit and recording stops automatically.
- Copy the link or save the GIF to disk. The link opens in any browser without signing up.
GIFs are recorded at about 10 frames per second, which keeps them small and is plenty for interface demos. GIF recording is included in DashShot's free plan; the same feature exists in the desktop apps for Mac and Windows if you need to capture something outside the browser.
Method 2: Record in the browser with an online recorder
Several websites record your screen right in the page and save the result as GIF — Ezgif's screen recorder is a popular free one. You open the site, allow screen sharing in Chrome's dialog, record, and download. There's no account and nothing to install.
The trade-offs: you get a file, not a link, so you still need to upload it somewhere; there's usually no region selection beyond what Chrome lets you share (a tab, a window or the screen); and the recording passes through a third-party site — fine for a public web page, worth avoiding for internal dashboards or client data.
Method 3: Convert a video you already have
If you've already recorded an MP4 — with the Windows Snipping Tool, Cmd+Shift+5 on a Mac, or any recorder — converting it to GIF takes a minute in the browser:
- Open an online video-to-GIF converter, for example Ezgif's "Video to GIF".
- Upload the video and set the start and end time — keep it under 10 seconds.
- Choose the size: 600–800 px wide is enough for most screen content.
- Set the frame rate to 10–15 fps.
- Convert, check the preview, then use the optimization tools (lossy compression, fewer colors) if the file is too big.
If you're comfortable with a terminal, FFmpeg does the same locally and produces cleaner colors with a two-pass palette: ffmpeg -i in.mp4 -vf "fps=12,scale=800:-1:flags=lanczos,split[a][b];[a]palettegen[p];[b][p]paletteuse" out.gif. That's the one exception to "no software install" here, but it's worth knowing if you make GIFs often.
GIF vs MP4: how big is the difference?
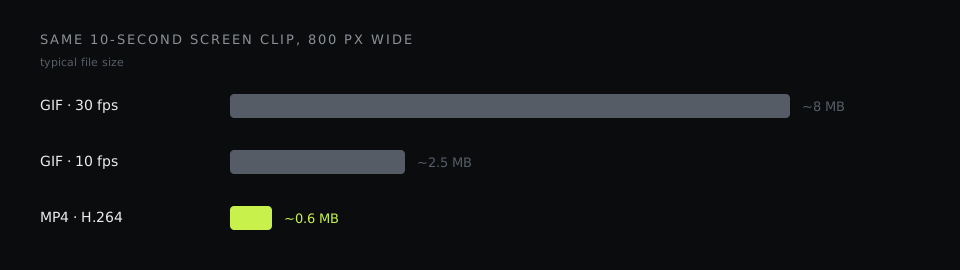
GIF is a format from 1987. It stores every frame as an image with at most 256 colors and has no modern compression between frames, so the same clip is usually several times larger as a GIF than as an MP4. Rough numbers for a 10-second screen recording at 800 px wide:
| Format | Typical size | Autoplays inline | Sound | Colors |
|---|---|---|---|---|
| GIF, 10 fps | 1–4 MB | Yes, almost everywhere | No | 256 per frame |
| GIF, 30 fps | 4–12 MB | Yes | No | 256 per frame |
| MP4 (H.264) | 0.3–1 MB | Only where muted autoplay is supported | Yes | Full |
The exact size depends on how much changes on screen: a cursor moving over a static page compresses well; scrolling a busy page or playing a video doesn't. That's why the most effective way to shrink a GIF isn't a compression setting — it's recording less: a smaller area, fewer seconds, fewer frames.
How to keep GIFs small and sharp
- Record a region, not the full screen. A 600×400 area is a fraction of the pixels of a 1920×1080 screen, and it focuses attention.
- Keep it short. Three to eight seconds covers almost every interface demo. Rehearse the clicks once before recording.
- 10–15 fps is enough. Interfaces don't need 30 fps; animations look fine at 15.
- Increase contrast, not size. Zoom the browser to 110–125% before recording so text stays readable after downscaling.
- Avoid gradients and video inside the recording. They're exactly what 256 colors handle worst.
- Pause before and after the action. Half a second of stillness at the start and end makes the loop readable instead of frantic.
Where GIFs work — and where they don't
Work well: GitHub and GitLab issues and pull requests, Jira, Linear, Notion, Confluence, Slack and Teams messages, Gmail and Apple Mail, most help-center tools, and README files.
Watch out: some versions of Outlook for Windows show only the first frame of a GIF, so put the important state in the first frame. Some chat apps convert GIFs to video on upload. And very large GIFs (over ~10 MB) may be rejected by trackers and email clients — another reason to keep them short.
When a GIF gets longer than about 15 seconds, or needs your voice, switch to a short video with a link instead. It'll be smaller, sharper and easier to follow.